Freelancer Registration Guide
This guide walks you through registering a Freelancer Account on NexusRMS. By the end, you will have a Freelancer Node with a public profile that rental companies can discover and connect with.
Step 1: Navigate to the freelancer signup page
You can reach the freelancer registration in two ways:
- From the main site — Go to nexusrms.io and select Freelancer when choosing your account type
- From a company's join page — If a rental company has shared their crew application link (company.nexusrms.io/join-crew), clicking it will take you directly to the freelancer registration pre-linked to that company
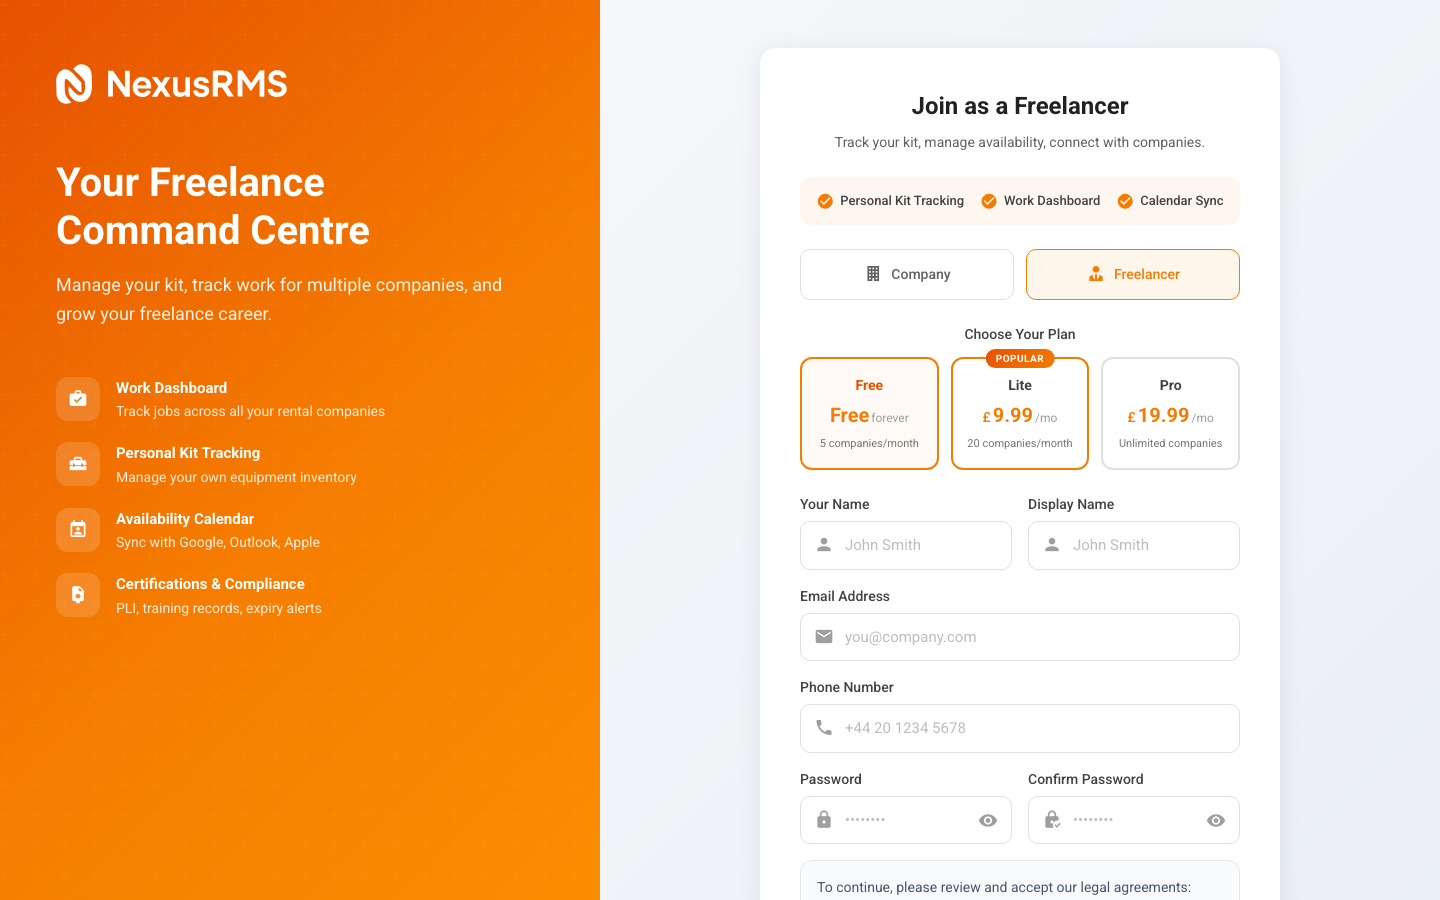
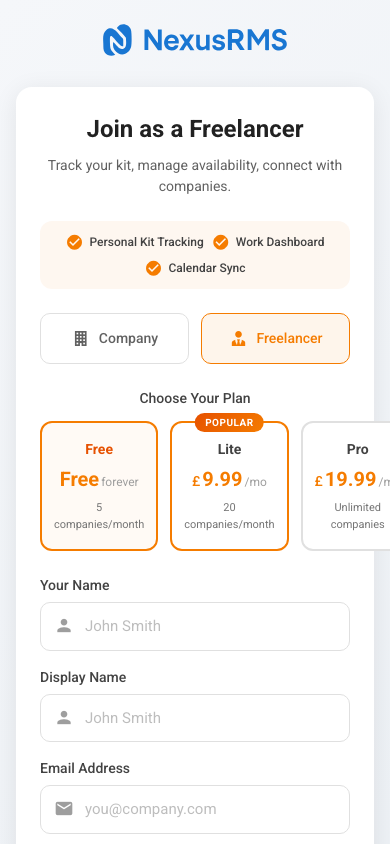
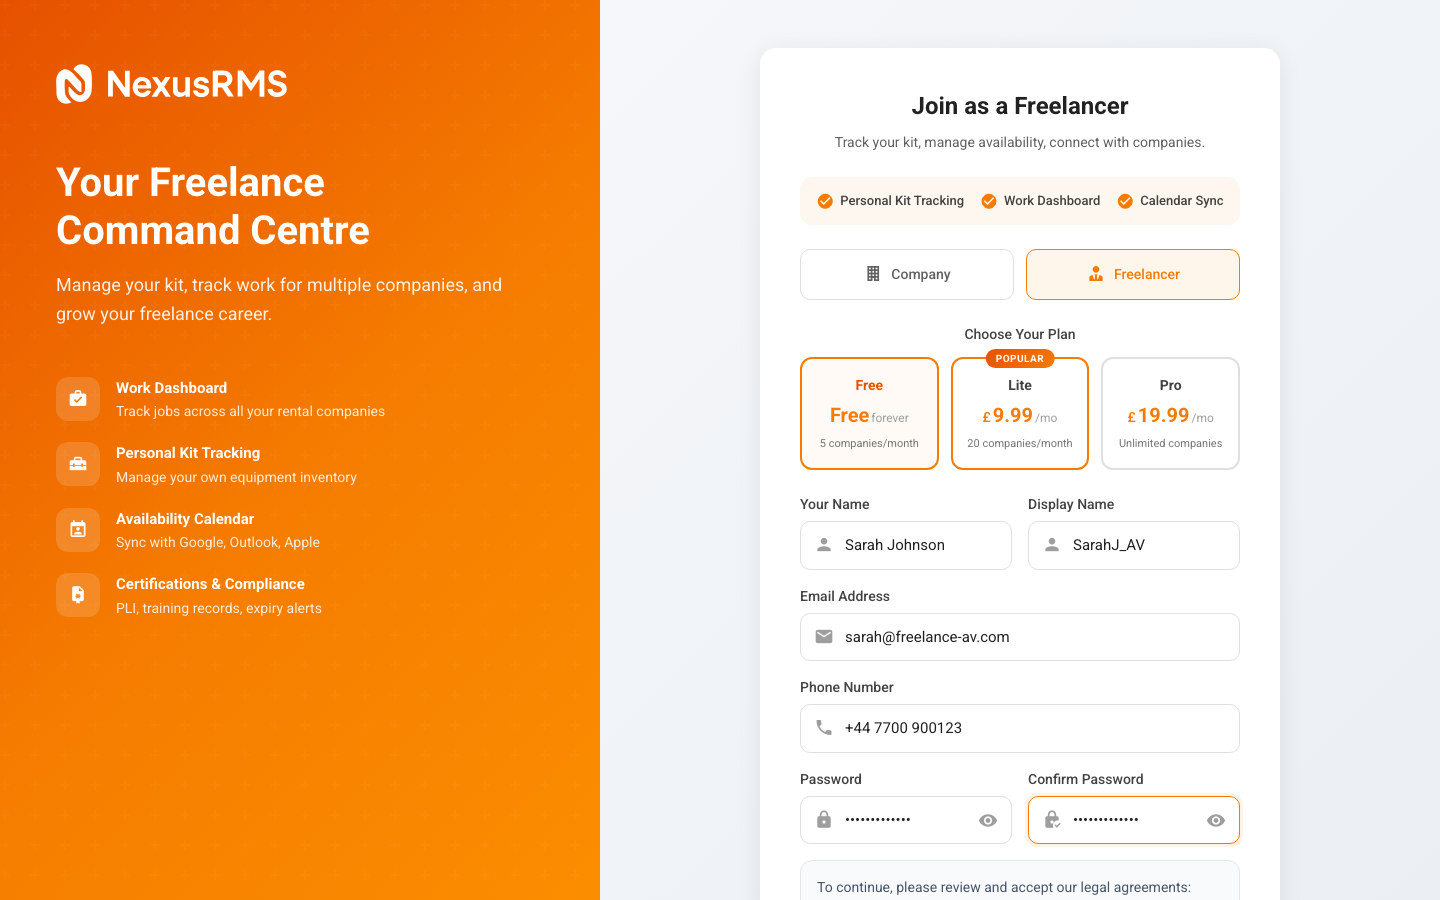
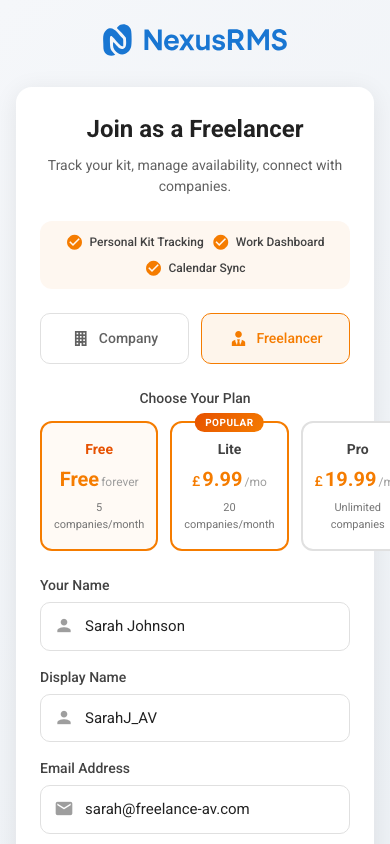
Step 2: Enter your personal details
The freelancer signup form collects your basic information:
Full Name
Enter your first and last name. This is displayed on your public profile and visible to companies searching for crew.
Email Address
Your email becomes your login credential. Verification is required before your Node is activated. Use an email you check regularly — companies will use this to send booking requests and messages.
Password
Choose a strong password with at least 8 characters. This secures your Node and all stored data including time entries, invoices, and compliance documents.
Phone Number
Your phone number is shared with connected companies for urgent communication. This is visible to companies you have connected with but not publicly displayed.


Step 3: Set up your profile
After the initial registration, you will be guided through your profile setup. The Freelancer Node supports a comprehensive 60+ field profile covering:
Professional Details
- Job title and primary role (e.g., Sound Engineer, Lighting Technician, Rigger)
- Skills and specialisations — Tag all your competencies for search matching
- Years of experience and career summary
- Equipment owned — List personal gear you can bring to jobs
Availability & Rates
- Day rate / hourly rate with currency preference
- Availability calendar synced with Google Calendar, Outlook, or Apple iCloud
- Travel radius and willingness to travel
- Notice period for bookings
Compliance Documents
- Public Liability Insurance (PLI) — Upload your certificate with expiry date
- Certifications — IPAF, PASMA, First Aid, IOSH, electrical qualifications, etc.
- Right to work documentation
- DBS check status (if applicable)
Companies can configure compliance blocking, meaning you cannot be booked for jobs if your PLI or required certifications have expired. Keeping your documents up to date ensures you are always bookable.
Step 4: Verify your email
Like company accounts, you will need to verify your email address before your Node goes live. Check your inbox for the verification email and click the confirmation link. See the Email Verification article for details.
Step 5: Connect with companies
Once verified, you can start connecting with rental companies:
- Auto-connect — When a company shares their join-crew link, clicking it creates an instant connection with no approval needed
- Company search — Browse and request connections with companies on the platform
- Inbound invitations — Companies can discover your profile and send connection requests
Connection limits depend on your tier (Free: 5/month, Lite: 20/month, Pro: unlimited). These limits apply to new connections only — existing connections are permanent.
Your Node URL
Your Freelancer Node is accessible at:
nodes.nexusrms.io/fl/your-alphanumeric-id
This alphanumeric ID is generated automatically during registration. Your public profile at this URL is visible to anyone with the link, making it easy to share with potential clients and companies.
Dual-database storage
When you work jobs through connected companies, your time entries and digital signatures are stored in both your Freelancer Node database and the company's tenant database. This means you always have your own records, even if a company connection ends.
Next steps
Continue to the Email Verification article to learn about confirming your email address and activating your account.
Was this article helpful?