Company Registration Guide
This guide walks you through registering a Company Account on NexusRMS, step by step. By the end, you will have a fully provisioned tenant workspace ready for your team.
Step 1: Navigate to the signup page
Go to nexusrms.io and click the Start Free Trial button in the top navigation. You can also navigate directly to the trial signup page.

Step 2: Enter your company details
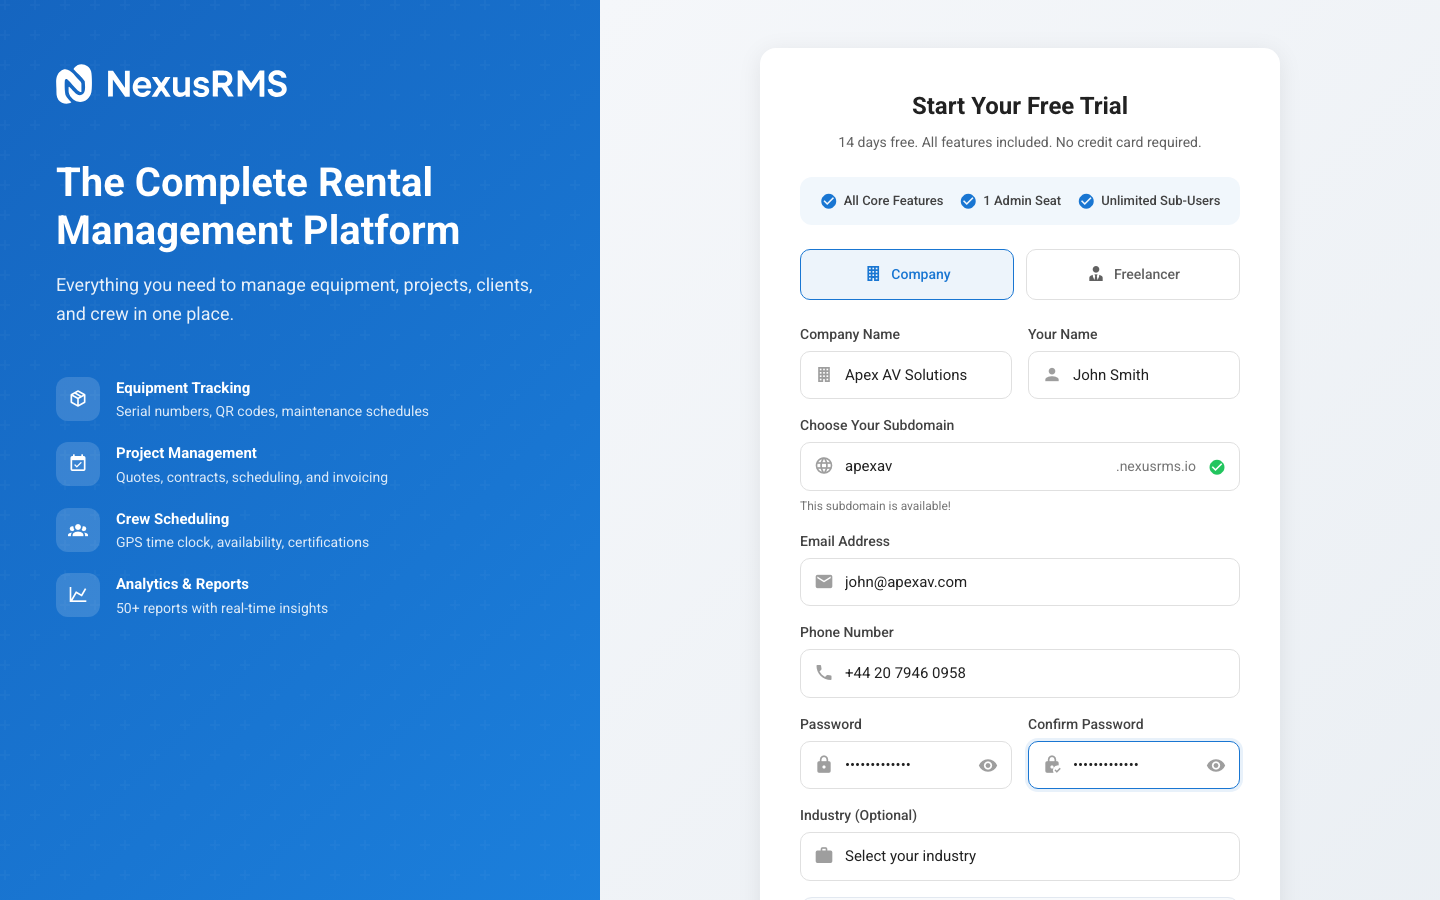
The signup form asks for the following information:
Company Name
Enter your registered company name. This is displayed throughout your workspace, on quotes, invoices, and client-facing documents. You can change it later in Settings > Company Profile.
Your Name
Enter your first and last name. As the account creator, you will be assigned the CoreAdmin role — the highest permission level with full access to financial data, settings, and user management.
Work Email
Use your business email address. This becomes your login credential and is where verification and account emails are sent. We recommend using a company domain email (e.g., john@yourcompany.com) rather than a personal email for professional accounts.
Phone Number (Optional)
Adding a phone number is optional but recommended for account recovery purposes.
Password
Choose a strong password with at least 8 characters. We recommend using a mix of uppercase, lowercase, numbers, and symbols. Your password is hashed using bcrypt and is never stored in plain text.
Team Size
Select your approximate team size. This helps us tailor your initial workspace configuration but does not limit the number of users you can invite.

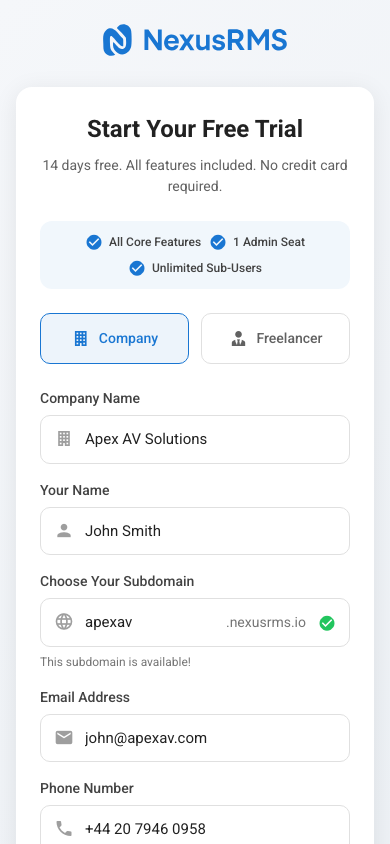
Step 3: Choose your subdomain
After submitting the initial form, you will be asked to choose your subdomain. This determines your workspace URL:
https://yourcompany.nexusrms.io
See the Choosing Your Subdomain article for detailed guidance on picking the right subdomain.

Step 4: Accept terms and conditions
Before submitting, you will need to agree to:
- Terms of Service — The contractual agreement governing your use of NexusRMS
- Privacy Policy — How we collect, store, and process your data
Both documents are linked directly from the signup form. We recommend reading them before accepting.
Step 5: Submit and verify
Click Start My Free Trial to submit your registration. You will receive a verification email within a few seconds (see the Email Verification article for details).
What happens next
After email verification, NexusRMS automatically provisions your tenant workspace:
- A dedicated PostgreSQL database is created for your company
- Default settings, categories, and templates are configured
- Your CoreAdmin user account is created in the tenant database
- Sample data is optionally loaded to help you explore
- Your workspace goes live at yourcompany.nexusrms.io
This provisioning process usually completes within 30 seconds. See the Account Provisioning article for more detail on what is set up.
Your trial includes everything
During the 14-day trial, you have access to:
- All core modules (Equipment, Projects, Clients, Financial, Warehouse, Crew, Dashboards, Analytics)
- All paid addons (Multi-Warehouse, PAT Testing, Transport, RAMS, Phase Planning, and more)
- Unlimited sub-users (Project Managers, Warehouse Staff, Technicians, Viewers)
- Full API access
- WebSocket real-time updates
No credit card is required. At the end of the trial, you can choose a plan or your account will be paused (not deleted).
Next steps
Continue to the Email Verification article to learn about confirming your email address.
Was this article helpful?