Creating Equipment
Creating equipment in NexusRMS uses a multi-tab wizard that lets you enter everything from basic details to warranty information in a single form. There is no forced step progression — you can click any tab in any order. The form auto-saves a draft every 30 seconds so you never lose work in progress.
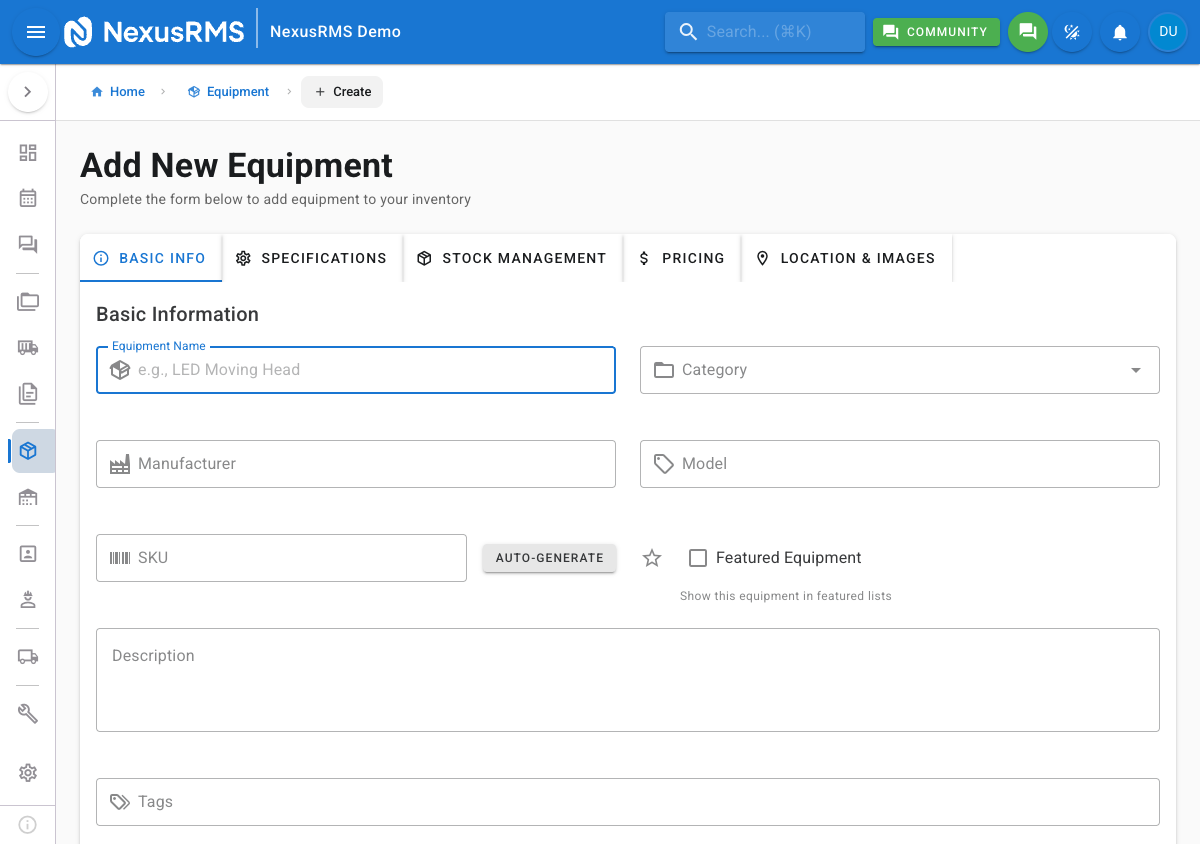
Tab 1 — Basic Info
The Basic Info tab captures the core identity of the equipment item.
- Equipment Name (required) — The display name for this item (e.g., "QSC K12.2 Active Speaker")
- Category (required) — Select from your hierarchical category tree using the dropdown. Categories must be created in advance under Equipment > Categories.
- Manufacturer — The brand or manufacturer name (e.g., QSC, Sennheiser, Robe)
- Model — The specific model identifier (e.g., K12.2, EW 100 G4, Pointe)
- SKU — Stock Keeping Unit. Auto-generated based on category and sequence, or enter a custom SKU manually. Toggle between auto and manual mode.
- Featured — Toggle to mark this item as featured. Featured items appear prominently in equipment selection lists and the Client Portal.
- Description — Free-text description of the item. Supports basic formatting.
- Tags — Add comma-separated tags for additional filtering and grouping (e.g., "outdoor, waterproof, premium")
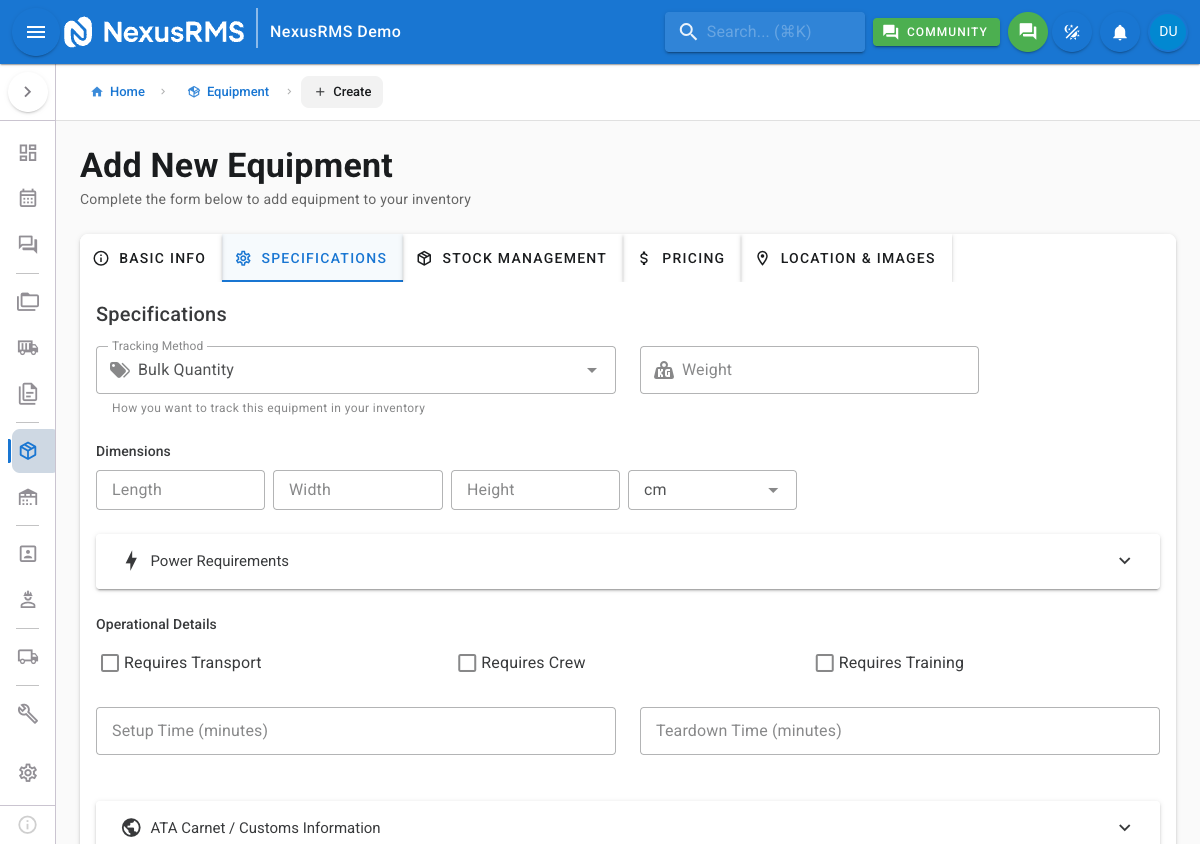
Tab 2 — Specifications
The Specifications tab captures the technical and operational details of the equipment.
Tracking & Identification
- Tracking Method — Choose Bulk (quantity only) or Serialized (individual units). Defaults to the value set in Equipment Settings.
- Barcode Format — Select the identification format: QR Code, Barcode, RFID, or None. QR Code is recommended for most use cases.
Physical Attributes
- Weight — Item weight with unit selector (kg or lbs)
- Dimensions — Length, Width, and Height with unit selector (cm, mm, inches, or feet)
Power Requirements
- Voltage — Operating voltage (e.g., 230V)
- Amperage — Current draw in amps
- Wattage — Power consumption in watts. If you enter any two of voltage, amperage, and wattage, the third is auto-calculated using Ohm's Law.
Operational Details
- Transport Required — Toggle indicating whether this item requires dedicated transport arrangements
- Crew Required — Toggle indicating whether crew members are needed to operate this item
- Training Required — Toggle indicating whether operators need specific training
- Minimum Crew Count — The minimum number of crew needed for safe operation (visible when Crew Required is enabled)
- Hire Type — Dry hire (equipment only) or Wet hire (equipment plus operator)
- Method Statement — Free-text field for operational procedures and safety notes
- Setup Time — Estimated time to set up this item (hours and minutes)
- Teardown Time — Estimated time to tear down this item (hours and minutes)
ATA Carnet Fields
- HS Code — Harmonized System code for customs classification
- Country of Origin — Country where the item was manufactured
- Dangerous Goods Class — UN dangerous goods classification if applicable
Tab 3 — Stock Management
The Stock Management tab controls quantities, condition, and serial number assignment.
- Total Quantity — The total number of units you own. For bulk items, this is the overall count. For serialized items, this determines how many serial number entries are created.
- Reorder Point — When available stock falls to this level, a reorder alert is triggered
- Reorder Quantity — The suggested quantity to reorder when stock hits the reorder point
- Condition — The current condition of the item: New, Excellent, Good, Fair, Poor, or Damaged
- Status — The operational status: Active (available for hire), Inactive (temporarily unavailable), Retired (end of life), or Sold
- Serial Numbers — For serialized items, the system either auto-generates serial numbers based on your Equipment Settings prefix and format, or you can enter them manually. Each serial number entry includes its own condition and status fields.
Tab 4 — Pricing
The Pricing tab configures the financial details for this equipment item.
- Purchase Date — The date the item was originally purchased
- Purchase Price — The original cost of the item
- Replacement Value — The current cost to replace this item. Used for insurance valuations and percentage-based pricing.
- Pricing Strategy — Choose Fixed Rate (manually set each rate) or Percentage of Replacement Value (rates auto-calculated as a percentage of the replacement value)
- Rental Rates — Daily, Weekly, and Monthly rates. Enter manually for Fixed Rate, or adjust the percentage for each period when using Percentage strategy.
- Factor Group — Select a factor group to apply multi-day discount pricing (e.g., 3-day rental at 2.5x daily rate). Factor groups are configured in Configuration > Project Settings.
- Minimum Rental Period — The shortest rental duration allowed for this item (e.g., 1 day, 3 days, 1 week)
Tab 5 — Location & Images
The Location & Images tab sets the default storage location and manages visual assets.
- Default Location Type — Where this item is typically stored: Warehouse, Site, Vehicle, or Client
- Storage Location — Specific shelf, bay, or bin code within the selected location (e.g., "Bay A, Shelf 3, Bin 12")
- Images — Upload up to 10 images using drag-and-drop or the file browser. Click the star icon on any image to set it as the primary image (shown in list views and cards). Supported formats: JPEG, PNG, WebP.
- Documents — Upload supporting documents such as user manuals, spec sheets, and safety data sheets. Supported formats: PDF, DOCX, XLSX.
Tab 6 — Warranty
The Warranty tab tracks warranty coverage for the equipment item. Toggle the Enable Warranty Tracking switch to reveal the warranty fields:
- Warranty Type — Manufacturer warranty, extended warranty, or third-party warranty
- Provider — The warranty provider name
- Policy Number — The warranty policy or reference number
- Start Date and End Date — The warranty coverage period
- Cost — The cost of the warranty (if purchased separately)
- Claim Limit — Maximum number of claims allowed under this warranty
- Deductible — The excess amount payable per claim
- Auto-Renewal — Toggle to mark this warranty for automatic renewal before expiry
Tabs 7 & 8 — Accessories and Alternatives (edit mode only)
These tabs are only available after the equipment item has been saved. They allow you to link related items:
- Accessories — Items that complement this equipment (e.g., cables, stands, cases). Accessories are suggested when this item is added to a project.
- Alternatives — Equivalent items that can substitute for this equipment if it is unavailable. The system can suggest alternatives automatically when an item is out of stock.
Form validation
Each tab displays a red badge with the number of validation errors if any required fields are missing or invalid. The Save button at the bottom of the form is always accessible, but submitting with errors highlights the affected fields and scrolls to the first error. The form auto-saves a draft every 30 seconds in create mode, so you can safely navigate away and return later.
Tips
- Fill Basic Info and Specifications first — These two tabs contain the most essential data. You can save and come back to complete Pricing and Warranty later.
- Use the auto-generated SKU — Unless you have an existing SKU system, the auto-generated format keeps your inventory consistent and searchable.
- Set up categories before bulk importing — If you plan to import equipment from a spreadsheet, having your category tree in place first means items are correctly categorised on import.
- Upload at least one image — Equipment with images is easier to identify in grid view, on packing lists, and in the Client Portal.
Next steps
Continue to the next article to learn about the Equipment Detail page, including the overview tab, availability breakdown, multi-warehouse distribution, and the full set of detail tabs.
Was this article helpful?